Showing posts with label Steampunk. Show all posts

Saturday, November 7, 2009

Steampunk Halloween Costume Completed!

I'm back at home now after a whirlwind trip to London, and fighting off a nasty head cold. My time got really crammed trying to finish my costume and all of the other preparations for the trip, so I have a lot of catching up to do here.

To complete the petticoat, I had to gather 9 1/2 yards of fabric, and then stitch that to a little more than 4 yards. Then that 4 yards had to be gathered and attached to the round yoke, which was probably the most difficult part of the entire project.  I was really intimidated by the gathering, but it was quite easy.  My only real issue was when I didn't stop my two rows of gathering stitches at the same spot.  That made gathering consistently quite difficult.


The hemming of the overskirt was also easier than I expected.  It took a long time, but I was pleased with the result.  I basted the entire skirt at the hemline that my husband was nice enough to pin for me.  I then stitched a longish stay-stitch about a quarter inch from the edge of the fabric.  I then pined up the bottom edge, pulling up the bobbin thread as I went to pull in the extra fabric (thanks to Vogue Sewing yet again!).  I then pressed that up into another fold and stitched.  Somewhere in there I removed the basting thread.


I then stitched the lace trim onto the face of the overskirt with two rows of stitches, and attempted to put the whole thing together.


This is where I really did myself in.  I was attempting to insert the zipper so that the netting layer would be treated like a lining.  I wanted the fabric to be finished to the zipper on the inside and out.  I basted, stitched, and stitched again all of the stitches to insert the zipper and put the two layers together, except one.  When the time came to turn the fabric right-side out, the two skirts sat next to each other not one over the top.  So, I tore out all of the stitches and started over with the zipper just hanging out inside the skirts.


Then, on the top of all of the layers, with the fabric right-side out, I stitched a top stitch to hold the zipper in place.  All went well until I got to the very top of the zipper, where the head was, as my sewing machine needle got pushed aside.


It wasn't the most polished zipper insertion known to man, but no one would see it anyway, and the petticoat was complete!  Straight-away I tried it on with the bits of the costume that I had ready.


You can see a little bit of the ribbon-trimmed net layer peeking out.  I realized part-way through the under skirt layer that I had an extra 5/8" on that layer because the pattern expected a 5/8" hem, which I did not do.  I attempted to compensate, but only compensated by adding an extra 1/4" to the seam allowance between the two net layers for a total of 4/8" reduction.  I didn't imagine that my sewing would be anywhere precise enough for 1/8" to matter, but I don't think you'd be seeing that hint of ribbon at the bottom if I had pulled out that extra 1/8" somewhere.

The completed costume (along with my equally steampunk-y date):


Allow me to share some of the details on the rest of the costume.  The corset is Fredrick's of Hollywood's Hollywood Dream Corset, appearing in Halloween costumes everywhere and which I happened to have lying around.  I added a braided trim to the seam/boning lines with hot glue to punk it up a bit.  The choker and wristlets I made with some ornate trim and gathered lace leftover from the petticoat trim.  I also attached a brassy button to disguise the closure of one snap.


The hat I purchased on e-bay from a woman in the UK who makes them, and had it shipped directly to my brother-in-law.


The jewelry I purchased on etsy.  Vintage copper flowers turned into earrings and a vintage vacuum tube with copper necklace.


The shoes were an indulgence, costing as much as the rest of the pieces put together, but I couldn't pass up their steamy awesomeness.  They have a spats-esque style, with ruffle details and gorgeous suede.  I might actually wear them with normal clothes.


And I have to show off the back of the corset, because I love it so much.


It was a lot of work to put it all together, but I was extremely pleased with the end result.  The only thing I would have changed would be to add more details.  But I think it came across steamy enough.  Our costumes were a big hit at the party, especially my husband's.

Wednesday, October 21, 2009

Update: Steampunk Costume

A quick update on the steampunk costume for Halloween: I've been sewing every night until the point of exhaustion trying to get ready for leaving next week. I have the overskirt of the petticoat hemmed (which was my one of my biggest fears), and the underskirt almost completely put together. I have another half of a seam to pin and then stitch and then put the two together.

All the accessories are in save one, which should be here any day now.

I'll have pictures and more details come the weekend...

Friday, October 16, 2009

Steampunk Costume: Petticoat

I spent most of the day today working with yards and yards of cream petticoat net. There were nine pieces in all, three for the upper tier and six for the lower. As the pieces were perfect rectangles, I cut them out with my rotary cutting tools. Great time saver!


Next, I sewed the pieces together using lapped seams so that there wouldn't be tons of scratchy netting poking me underneath my skirt.


Finally, I hemmed the bottom-most layer, all 9 1/2 yards, with ribbon.

I prepped the under-layer yoke earlier in the week, so all I have left to do is hem the upper layer, attach the lace trim, and stitch it all up!

I only have a little over a week to go and I am definitely feeling the pressure!

Monday, October 12, 2009

Costume Take Two: Steampunk


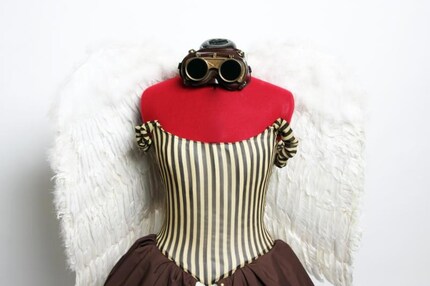
In my search for awesome fairy wings, I stumbled across this amazing steampunk fairy costume on Etsy.  I had heard of steampunk, but only in the literary sense.  Alla Wikipedia, I soon found myself in a rabbit hole of steampunk fashion fascination.  I had to have something steamy for Halloween!

I didn't have time to make a complete costume, so I started in my own closet and came up with a corset and interesting leather skirt.  For embellishment, I decided that a petticoat was in order, among other, smaller accouterments.


I had picked up Simplicity 5006 when I was thinking fairy costume, and figured I could make it work for a victorian-esque petticoat.  Since my leather skirt isn't terribly full, I decided to go with view B (rightmost).  The pattern called for taffeta for the top layer.  I figured it was as good a time as any to try working with such slippery fabric and dove right in with a gorgeous copper taffeta (polyester, unfortunately) and a cream colored net for the under layer.

The first challenge was shortening the pattern.  My skirt is only 33" long, and the pattern creates a 39" long petticoat.  After much careful measuring, I took 6" off of the bottom of each of the upper skirt's pattern pieces.  I attempted to match the curve by cutting a short piece off of the bottom, then lining that up to the 6" marks for the final cut.

My next struggle was laying out the fabric.  After one false start, I used a rotary-cutting ruler to ensure that my center fold was straight and got both pieces for the upper skirt layed out and cut.

My Vogue Sewing book recommended a straight stitch of 12-15 stitches per inch, and to hold the fabric taut while stitching.  I think this worked pretty well, with very little waffling that I see so often on homemade clothes with shiny fabrics like this.  Next, I used an overstitch foot that came with my machine and a zigzag stitch to enclose the raw edges.  The first seam went smashingly (except for breaking one needle thanks to the my sewing machine's manual's very confusing instructions).  However, the side seams ended up terribly scalloped no matter what I tired.  I think this may be due to the fabric being on a bias at this point.  I might try a straight stitch first next time.


Now, the skirt is hanging to let the bias drop (thanks to Sommerset that I knew that one before reading it in Vogue Sewing!), and I'm working on cutting out the pieces for the underskirt.  Two weeks and counting!