Sunday, January 17, 2010

Bronwyn's Christmas Stocking Complete!

I completed the Christmas stocking for my husband today.  This one have been sitting around since late 2008.  I wanted to finish it before I put away all the Christmas goodies, and thatwas motivation enough!


Since my last post on the topic I had successfully stitched the boot front and back together.  So all that was left this weekend was the cuff and putting it all together.  My husband had modified the pattern when we started on the project in '08 because he wanted the boot cuff to be much wider than the boot, with an open, pointy front.  I cut that out of red cotton corduroy and striped it with gold braid.


The cuff sides and bottom were sewn face-to-face with a matching black piece.  The back edge of the cuff was also sewn face-to-face where it would extend past the circumference of the boot itself.  I then cut the seam allowance to allow the remaining fabric to sit flat open.


Next came lacing the boot in preparation for final assembly.  This was incredibly tricky, as the cording was pretty much exactly the same size as the grommet opening.  With taped ends and a lot of twisting, pulling, and pushing, I managed to get the laces through.


Putting the whole thing together was definitely the hardest part.  I had the main boot layer, two layers of cuff, which were much longer than the other layers, and then one layer of lining, with braid occasionally as well.  I meticulously pinned the various layers together and then stitched, one side at a time so as to leave the extra cuff layers out of the stitching.


Then, I had to push the entire stocking, the boot, the cuff, and the lining, through a tiny hole left open in the lining for just such a purpose.  I ended up having to rip the seam out a little bit, but I stitched it closed afterwards, and you would never know.


With a little touch up to the loose ends such as the front of the cuff and adding the loop, the stocking was complete!  Only then did I notice that I hadn't used the interfacing that I knew the project called for...  Looking back in the pattern instructions, I found the bit about the interfacing, the very first step after cutting out the pieces, followed by a bunch of hoopla about how to decorate the stocking to match what is shown on the pattern envelope.  I had skipped all of that without realizing I had missed an important bit.  So, the stocking hangs pretty limp.  We'll just have to fill it early in the Christmas season!

Saturday, January 2, 2010

New Year, Renewed Efforts

2010. Hard to believe!

I have finished Dragon Age: Origins, the great sewing diversion. And I have finally gotten my sewing space reclaimed. (If I don't use it for more than a day or two, it gets consumed by my husband's tech projects. The longer it doesn't get used, the harder it seems to be to dig out.)

With the holidays over (although I do still have family in town for another week and a half), I hope to have a renewed focus on sewing. However,

I am pregnant!

Things haven't been two bad so far, but I do find myself with less energy than I am accustomed to. So that may impact things a little.

I did renew work on Bronwyn's Christmas stocking yesterday (a little late, I know). It's been so long since I worked on it, that I didn't quite realize where I was at with the project. Turns out, I need a spool of thread to really be able to go on. More on that soon.

2010 is going to be full of changes. I fully intend sewing skills and completed projects to be among them.

On to the next stitch!

Wednesday, November 25, 2009

Sewing Diversion

So I haven't sewed a single stitch in over a week.  Things have been particularly busy in my life over the past few months, but the real culprit is a new video game: Dragon Age Origins.  I'm a sucker for epic anything, books, movies, and yes video games.  I'm several hours in already and loving the overall game, although the archer playability is not as fun as some others.

I'm hopeful that I will get to some sewing this weekend.  I still need to finish up Bronwyn's stocking and have plenty of work to do on the Colorado Quilt...  Happy Thanksgiving!

Thursday, November 19, 2009

Bronwyn's Stocking

After an ill-advised attempt to work with faux leather early in my sewing experiences, I did not get a stocking made for my husband last Christmas.  I came across some fabric-weight faux suede on sale at Joann's at Halloween time and decided to try some of that instead.  So now I'm working on making a neat boot-esque stocking for this Christmas.

My husband decided he wanted a tongue of green satin showing between laces on the top of the boot.  With my front and back cut out and ready to go, I was a little stumped on how to get the tongue in and make it look polished.  I ended up basting the right sides of the boot together up to the point where the tongue would start.


I took a straight rectangle of satin and sewed it right-sides together to one of the fronts of the boot.  I then let the satin sit naturally with right-sides out to find the placement, pinned, and then sewed it.


After cutting off the excess satin, I finished the edges with an overlock stitch.  I then removed the basting stitch and opened up the stocking so that I could insert grommets for the lacing.


With the tongue and grommets in place, I can now sew the boot front and back together with the tongue edge finished under the boot seam.


I'm not crazy about the waffling in the satin.  If I had it to do over, I would try to figure out the placement of the satin piece first and center it on the lengthwise grain of the fabric.  As I was sewing the two sides I could tell the difference in the pull of the side that had more bias in it.  I also didn't do a test for tension and stitch length, which would have been a good idea.  My husband says it looks cool, like the tongue is just floating behind the boot, but I never can tell if he's just being kind.

Tuesday, November 17, 2009

Sewing Project #3: Christmas Stocking


With a cozy pair of pajamas and a fun but not terribly flattering poodle skirt under my belt, Christmas time was fast approaching. I was working on the Colorado Quilt in bits and pieces, but got excited about the idea of making a custom Christmas stocking.  After perusing some options, I decided to go with a big three pattern, McCall's 5549 to be precise.

I used view B for the basic shape, and went about designing my own decorative elements.  Putting my newfound quilting skills to work, I started with piecing together 2" squares for the main portion of the stocking from Christmas-y cotton quilting fabric.  After adding batting and an underlayer of tulle, I quilted the squares "in the ditch" so-to-speak.  I then stay-stitched around the shape of the stocking inside the seam allowance and cut it out.


I then added red corduroy toe and heel covers with Christmas-y white and gold piping at the edges.  The piping I found was really neat, although I unfortunately don't have any photos.  It looked just like cording you would find anywhere, but it was attached to a flat woven edge.  Very easy to insert.  The trickiest part was lining up the toe and heel pieces on the two sides.  The piping made that especially difficult, as it was significantly thicker there than in the other spots, which made it want to shift.


For the lining, I used a poly shimmery gold brocade that was a bit tricky to work with and unraveled everywhere.


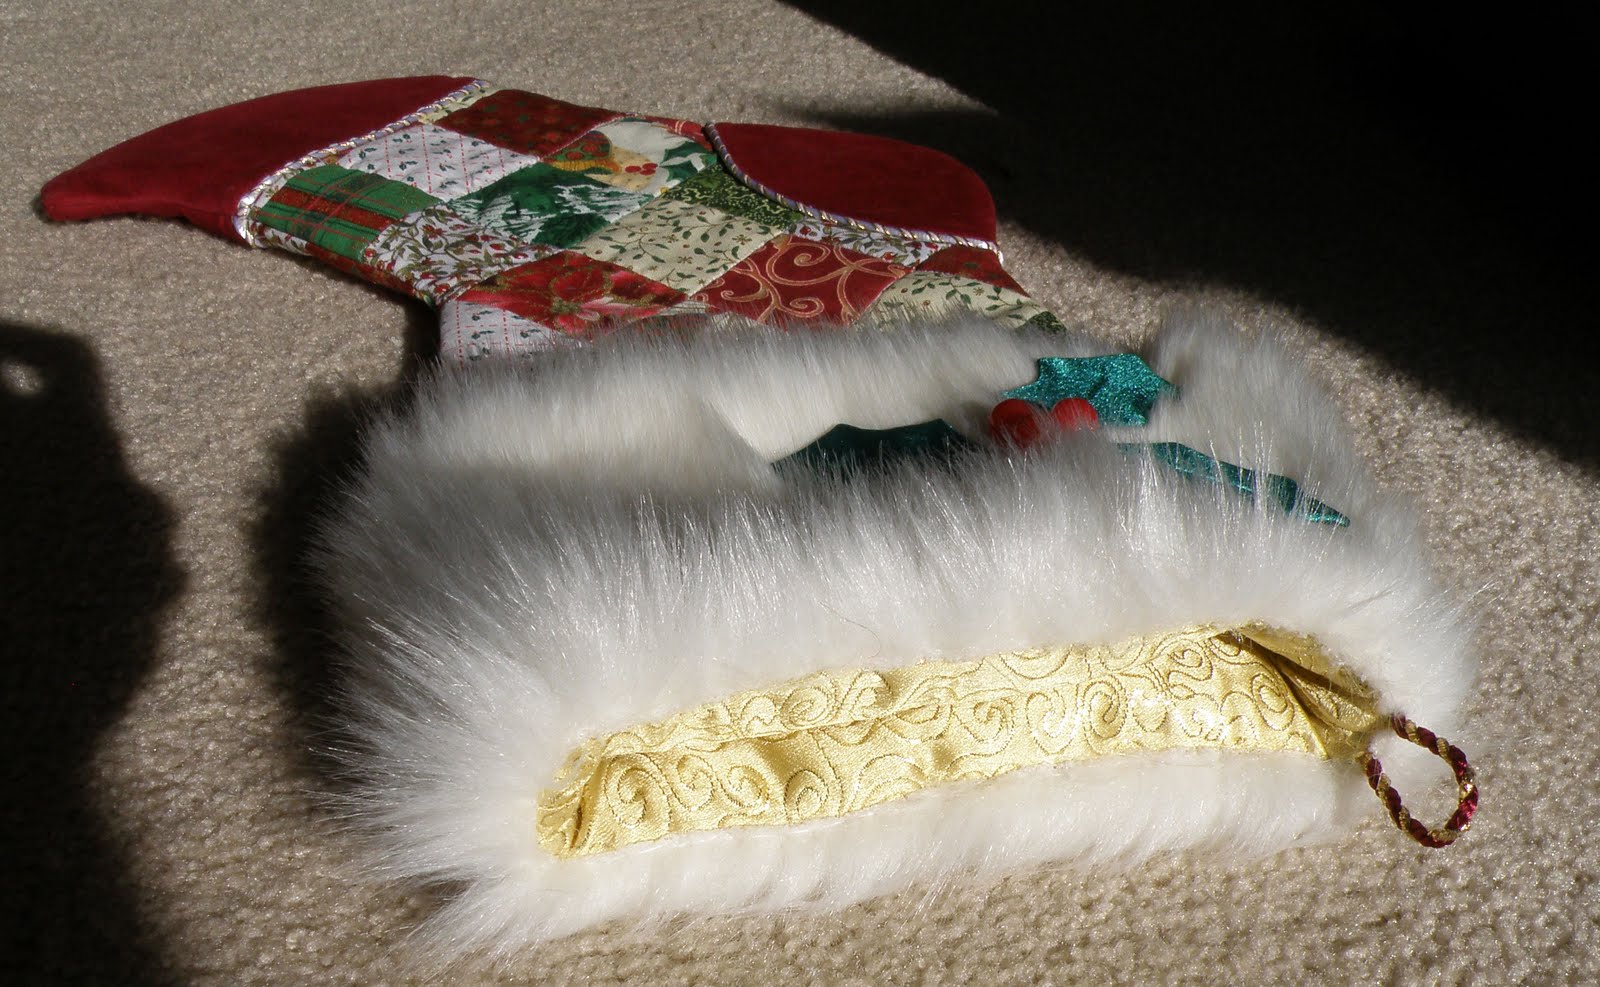
With that done, all that was left was to add a cuff.  I ordered some faux polar bear fur from some place online that I don't now recall.  I stitched it to the lining fabric to create a loose cuff that I could add to the stocking top.  I should have done this first, but afterwords, I cut holy leaf shapes from stiff interfacing and steamed some green satin to the shapes.  I then attached the leaves to the cuff with a single stitch down the center to look like the stem of the leaf.  Three red buttons in the center of the leaves made cute holy berries and the cuff was ready to be attached.  I sewed the lining layer to the stocking with right sides together and then hand-stitched the fur layer in place so that the stitches wouldn't get in the way of the fun bounce of the fur.

The green of the satin is a much closer color to the greens of the cotton in person than they turned out looking on the camera.


A view of the top/inside of the completed stocking.

I was incredibly, absurdly, ridiculously happy with how the stocking turned out.  I enjoyed the ability to be original and creative with the elements of the piece, and I also loved working on something that came together so quickly.

Saturday, November 14, 2009

Colorado Quilt: Meager Progress

I have been struck down by the sickness going around this week, so I have made little progress on the current top-priority project, the Colorado Quilt.  I have previously washed and folded up my new pink fabrics, so I was able to get some cutting done this week.


I still have a tad more cutting to do.  I also need to pull apart some of the blocks that I decided not to use so that I can use some of the pink fabrics that I did like from those blocks.  Then it is on to piecing!


So far, my bible on cutting and piecing has been Nancy Johnson-Srebro's Rotary Magic, a gift from my quilting mentor.  She has some great tips on how to get straight cuts and how to fold and store fabrics.  One issue I have been having, however, is if my fabrics are folded for more than a day or two before I get around to cutting from them, I end up with soft creases like you can see in the above picture, that I am sure are affecting the straightness of my cuts.  I think I might iron my fabrics just before cutting next time.

Sadly (in the sewing sense at least), I have out-of-town guests this weekend, so I'm not sure how much I'll get done...

Saturday, November 7, 2009

Steampunk Halloween Costume Completed!

I'm back at home now after a whirlwind trip to London, and fighting off a nasty head cold. My time got really crammed trying to finish my costume and all of the other preparations for the trip, so I have a lot of catching up to do here.

To complete the petticoat, I had to gather 9 1/2 yards of fabric, and then stitch that to a little more than 4 yards. Then that 4 yards had to be gathered and attached to the round yoke, which was probably the most difficult part of the entire project.  I was really intimidated by the gathering, but it was quite easy.  My only real issue was when I didn't stop my two rows of gathering stitches at the same spot.  That made gathering consistently quite difficult.


The hemming of the overskirt was also easier than I expected.  It took a long time, but I was pleased with the result.  I basted the entire skirt at the hemline that my husband was nice enough to pin for me.  I then stitched a longish stay-stitch about a quarter inch from the edge of the fabric.  I then pined up the bottom edge, pulling up the bobbin thread as I went to pull in the extra fabric (thanks to Vogue Sewing yet again!).  I then pressed that up into another fold and stitched.  Somewhere in there I removed the basting thread.


I then stitched the lace trim onto the face of the overskirt with two rows of stitches, and attempted to put the whole thing together.


This is where I really did myself in.  I was attempting to insert the zipper so that the netting layer would be treated like a lining.  I wanted the fabric to be finished to the zipper on the inside and out.  I basted, stitched, and stitched again all of the stitches to insert the zipper and put the two layers together, except one.  When the time came to turn the fabric right-side out, the two skirts sat next to each other not one over the top.  So, I tore out all of the stitches and started over with the zipper just hanging out inside the skirts.


Then, on the top of all of the layers, with the fabric right-side out, I stitched a top stitch to hold the zipper in place.  All went well until I got to the very top of the zipper, where the head was, as my sewing machine needle got pushed aside.


It wasn't the most polished zipper insertion known to man, but no one would see it anyway, and the petticoat was complete!  Straight-away I tried it on with the bits of the costume that I had ready.


You can see a little bit of the ribbon-trimmed net layer peeking out.  I realized part-way through the under skirt layer that I had an extra 5/8" on that layer because the pattern expected a 5/8" hem, which I did not do.  I attempted to compensate, but only compensated by adding an extra 1/4" to the seam allowance between the two net layers for a total of 4/8" reduction.  I didn't imagine that my sewing would be anywhere precise enough for 1/8" to matter, but I don't think you'd be seeing that hint of ribbon at the bottom if I had pulled out that extra 1/8" somewhere.

The completed costume (along with my equally steampunk-y date):


Allow me to share some of the details on the rest of the costume.  The corset is Fredrick's of Hollywood's Hollywood Dream Corset, appearing in Halloween costumes everywhere and which I happened to have lying around.  I added a braided trim to the seam/boning lines with hot glue to punk it up a bit.  The choker and wristlets I made with some ornate trim and gathered lace leftover from the petticoat trim.  I also attached a brassy button to disguise the closure of one snap.


The hat I purchased on e-bay from a woman in the UK who makes them, and had it shipped directly to my brother-in-law.


The jewelry I purchased on etsy.  Vintage copper flowers turned into earrings and a vintage vacuum tube with copper necklace.


The shoes were an indulgence, costing as much as the rest of the pieces put together, but I couldn't pass up their steamy awesomeness.  They have a spats-esque style, with ruffle details and gorgeous suede.  I might actually wear them with normal clothes.


And I have to show off the back of the corset, because I love it so much.


It was a lot of work to put it all together, but I was extremely pleased with the end result.  The only thing I would have changed would be to add more details.  But I think it came across steamy enough.  Our costumes were a big hit at the party, especially my husband's.